Unlocking the hidden potential of a custom-built PC can feel like embarking on a riveting adventure, where every pixel is crisper, every frame runs smoother, and every virtual world feels more immersive. But alas, even the most meticulously crafted machines have a few tricks up their motherboard’s sleeve. Enter the realm of troubleshooting, where the unexpected gremlins lurk and the tech savants emerge as mighty problem-solvers. In this article, we delve into the intriguing universe of custom PC pitfalls, unmasking common issues, and unveiling surefire solutions that will rescue your rig from the clutches of frustration. So, fasten your seatbelts and embark on a journey where conquering conundrums is just a few clicks away!
– Identifying Hardware Compatibility Issues: A Comprehensive Guide to Ensure Smooth Functioning of Your Custom PC
One of the most exciting aspects of building a custom PC is being able to handpick each component to suit your specific needs. However, this level of customization also brings with it the potential for hardware compatibility issues. In this comprehensive guide, we will delve into the common issues that can arise when building a custom PC and provide you with practical solutions to ensure smooth functioning.
1. **Mismatched Socket Types**: One of the primary hardware compatibility issues you may encounter is using a processor that does not fit into the motherboard’s socket. To avoid this, carefully research and select a motherboard that is compatible with your chosen CPU. Ensure that the socket type matches and that the motherboard supports the same generation of the processor.
2. **Insufficient Power Supply**: Another common issue custom PC builders face is a power supply that can’t handle the demands of their components. To prevent this, calculate the wattage requirements of your system by adding up the power consumption of each component, including the CPU, GPU, RAM, and storage devices. Always select a power supply unit (PSU) that exceeds the total power requirement to allow for any future upgrades or additions.
3. **Incompatible RAM**: RAM compatibility is crucial for optimal performance. When choosing RAM modules, check the speed and generation compatibility with your motherboard. Ensure that the RAM sticks are compatible with the motherboard’s architecture, whether it is DDR4, DDR3, or any other type. Furthermore, double-check that the total memory capacity does not exceed the motherboard’s supported limit.
By keeping these common hardware compatibility issues in mind during the custom PC building process, you can ensure a smooth and problem-free experience. Researching and selecting compatible components, including the CPU, power supply, and RAM, will help you avoid headaches later on. So, take your time, follow the guidelines, and enjoy the rewarding experience of building your very own bespoke PC.
– Resolving Overheating Problems: Effective Cooling Solutions to Extend the Lifespan of Your Built-For-Performance Machine
Custom-built PCs are notorious for their impressive performance and speed, but they also come with their fair share of challenges. One common issue that many users encounter is overheating, which can have detrimental effects on the lifespan and overall performance of your prized machine. Fortunately, there are various effective cooling solutions that can help alleviate this problem and ensure that your custom-built rig stays running smoothly for years to come.
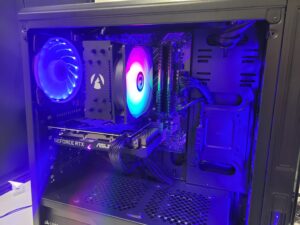
One of the most important steps in resolving overheating problems is to ensure good airflow within your computer case. Start by carefully examining the placement of your components and make sure that they are not blocking the airflow. Consider rearranging cables, moving components to different slots, or installing additional case fans if needed. By optimizing the airflow, you can prevent the accumulation of heat pockets and allow for better temperature regulation.
Another effective cooling solution for addressing overheating issues is to invest in a high-quality CPU cooler. The CPU generates a significant amount of heat, especially during intense gaming sessions or resource-heavy tasks. Upgrading to a more robust and efficient cooler can help dissipate heat more effectively, reducing the risk of thermal throttling or damage to the CPU. Look for reliable options that offer a combination of excellent cooling performance and low noise levels to strike the perfect balance.
– Patching Software Glitches: Troubleshooting Tips to Address Common Bugs and Errors in Custom PC Systems
Software glitches can be a frustrating experience for custom PC users. From random crashes to slow performance, these bugs can disrupt our workflow and hinder productivity. However, fret not! We have compiled a list of troubleshooting tips to help you address and patch these common bugs and errors in your custom PC system.
One common software glitch is the infamous “Blue Screen of Death” (BSOD) error. This error usually occurs when there is a driver or hardware issue. To troubleshoot this problem, start by checking for any outdated or incompatible drivers. Visit the manufacturer’s website for the latest driver updates, ensuring you download and install the correct version for your hardware. If the issue persists, try removing any newly installed hardware or software, as they may be causing conflicts. Remember to always keep your operating system up to date, as patches and updates often fix known bugs and vulnerabilities.
Another pesky bug that custom PC users may encounter is the “Application Not Responding” error. This error message pops up when an application freezes or becomes unresponsive. To tackle this issue, try closing the application using the task manager. Press Ctrl+Alt+Delete and select “Task Manager” from the options. Locate the unresponsive application under the “Processes” tab, right-click on it, and choose “End Task”. If this doesn’t work, try restarting your computer and launching the application again. Consider clearing the application’s cache or reinstalling it if the problem persists.
Lastly, sluggish performance is a common complaint among custom PC users. If you notice your system running slower than usual, it’s time to take action. Start by checking your computer’s resource usage. Open the task manager by pressing Ctrl+Shift+Esc, and navigate to the “Performance” tab. Here, you can monitor CPU, memory, and disk usage. If any of these parameters are consistently hitting high levels, it may be time to clean up your system. Uninstall any unnecessary programs, delete temporary files, and run a disk cleanup. Additionally, running a reputable antivirus software can help detect and remove any malware that may be causing your PC’s performance to suffer.
By following these troubleshooting tips, you can address common bugs and errors in your custom PC system effectively. Remember to always back up your data before making any significant changes, and never hesitate to seek professional support if needed. Enjoy a smoother, glitch-free computing experience!
– Diagnosing and Fixing Connectivity Problems: Expert Recommendations to Maintain Stable Network and Device Connections
In the world of custom-built PCs, encountering connectivity problems is not an uncommon occurrence. When your carefully crafted masterpiece experiences hiccups in maintaining stable network and device connections, it can be frustrating and overwhelming. But fear not! We have gathered expert recommendations and solutions to help you diagnose and fix these common issues swiftly and effortlessly.
First and foremost, a key step in troubleshooting connectivity problems is to check your physical connections. Ensure that all cables are securely plugged in without any visible damage. Sometimes, a loose cable or a faulty port can be the root cause of your connectivity woes. Take a moment to inspect your Ethernet cables, USB connectors, and power cables, making sure they are snugly fitted into their respective ports and sockets.
If your physical connections seem to be in order, the next step is to examine your network settings. Often, misconfigured settings can wreak havoc on your network stability. Access your network adapter settings through the Control Panel or System Preferences, depending on your operating system. Ensure that your adapter is enabled and configured correctly, paying particular attention to IP address settings, subnet masks, and default gateways. If you’re uncertain about specific settings, consult your internet service provider or refer to their support documentation for guidance.
Furthermore, it’s crucial to keep your drivers up-to-date. Outdated or incompatible drivers can cause erratic connectivity issues. Visit the manufacturer’s website to download and install the latest drivers for your network adapter, motherboard, and other relevant components. Regularly checking for driver updates is essential for maintaining stable connections and ensuring optimal performance.
By following these expert recommendations, you can confidently tackle and resolve common connectivity issues that may arise with your custom PC. Remember, the key is to stay vigilant, be thorough in troubleshooting, and keep your hardware and software updated. A stable network and device connection is the foundation for a seamless computing experience, and with a little diligence and know-how, you can enjoy uninterrupted technology bliss.
– Troubleshooting Boot-Up Failures: Steps to Address Startup Issues and Ensure Quick, Reliable System Initialization
Troubleshooting Boot-Up Failures: Steps to Address Startup Issues and Ensure Quick, Reliable System Initialization
Boot-up failures can be quite frustrating, especially when you’ve invested time and effort into building your custom PC. Fear not, for we have compiled a list of common issues and their corresponding solutions to help you troubleshoot your system and get it up and running smoothly in no time!
1. **Check your connections:** The first step in addressing boot-up failures is to ensure that all your hardware components are securely connected. Start by inspecting the power cables, graphics card, RAM sticks, and storage devices. Make sure they are firmly plugged into the appropriate slots. Sometimes, a loose connection can prevent your system from initializing properly.
2. **Reset the BIOS settings:** If verifying the connections doesn’t resolve the issue, it might be worth resetting the BIOS settings to their default values. Locate the CMOS battery on your motherboard and remove it for a few seconds. Reinsert the battery, and it will reset the BIOS to its default configuration. This can often resolve compatibility issues or incorrect settings that may be causing startup problems.
3. **Test individual components:** If the previous steps didn’t solve the problem, it’s time to start diagnosing individual components. Begin by testing your RAM sticks one by one. Remove all but one stick and try booting up your system. If it fails, switch to another stick until you identify the faulty one. Similarly, you can perform tests on your graphics card, hard drive, and other essential components to pinpoint and replace any defective parts.
Future Outlook
As we reach the end of this expedition through the intricate world of troubleshooting your custom PC, we hope you are standing tall, armed with newfound knowledge and confidence. The path we’ve traveled has been paved with obstacles, the kind that can cause sleepless nights for PC enthusiasts. Yet, fear not, for we have successfully deciphered the code that unlocks the solutions to common issues.
While exploring the depths of your custom-built machine, we embarked on a quest to illuminate the dark corners where hardware and software harmoniously dance. Armed with magnifying glasses and our unwavering determination, we delved into the labyrinth of wires, components, and codes, unearthing mysteries that often stump even the most seasoned tech savants.
Together, we unmasked the ghostly specter of blue screens and freezing errors, revealing the hidden culprits lurking beneath. Enabled by the magic of diagnostics, we sparred with power supply conundrums, vanquished unresponsive peripherals, and banished the gremlins that plagued your PC’s performance.
As we journeyed, we discovered that every issue has its own unique riddle, akin to an enigma waiting to be unraveled. Patience and persistence became our steadfast companions, as we followed trails of breadcrumbs leading to invaluable solutions. There were moments of frustration and bewilderment, but with every obstacle we overcame, we grew stronger, wiser, more resilient.
In this realm where technology reigns supreme, the pursuit of perfection is ceaseless. Your custom PC, a masterpiece crafted by your own hands, is a testament to your dedication and love for all things digital. And though greatness may come at a cost, the empowerment and joy it brings are immeasurable.
As we bid you adieu, remember that trials and tribulations will continue to grace your path. But rest assured, armed with the tools and knowledge bestowed upon you, you shall never again be at the mercy of a misbehaving machine. Harness the strength of troubleshooting, unravel the mysteries that lie ahead, and unlock the full potential of your custom creation.
Go forth, intrepid troubleshooter, and conquer the ever-evolving realm of technology with unwavering grace and precision. May your custom PC forever radiate with brilliance, and may the spirit of troubleshooting guide you through all obstacles that come your way.


