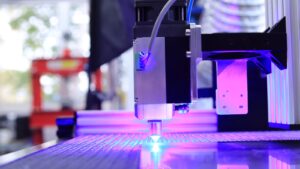
In a world bursting with possibilities, there’s an undeniable allure to rolling up your sleeves and embarking on a do-it-yourself (DIY) adventure. Whether you’re breathing new life into an old gadget or customizing your trusty hardware companion, the thrill of creativity knows no bounds. However, amidst the excitement, it’s crucial to remember one golden rule: safety first. Welcome to the realm of responsible DIY hardware modifications, where caution and creativity go hand in hand. In this guide, we will navigate the winding roads of reimagining and revamping your devices, all while keeping hazards at bay. So grab your tools, fasten your seatbelt, and let’s embark on a journey where we transform the ordinary into the extraordinary, one modification at a time.
Heading 1: Importance of Safety Precautions: Ensuring Smooth, Risk-Free DIY Hardware Modifications
When it comes to delving into the thrilling world of do-it-yourself (DIY) hardware modifications, safety should always be your number one priority. Whether you’re an experienced enthusiast or just starting out, taking the necessary precautions can make all the difference between a successful project and a disastrous outcome. From protecting yourself to safeguarding your equipment, this post will guide you through the importance of implementing safety measures into your DIY hardware journey.
First and foremost, one must not overlook the significance of personal protective equipment (PPE). Before embarking on any hardware modification endeavor, ensure you have the necessary gear. Safety goggles shield your eyes from stray sparks and harmful debris, while gloves provide a protective barrier against sharp edges and potential injuries. Don’t forget a breathable face mask to keep harmful fumes at bay. By equipping yourself with the right PPE, you lower the risks and enhance your confidence in handling hardware modifications.
Secondly, familiarize yourself with the equipment and tools you’ll be using. Understanding their function and potential hazards is crucial to working on your projects with confidence and precision. Always check for any visible damages or faults in your tools before starting. Ensure all power sources are disconnected and, if necessary, use lockout-tagout procedures to prevent accidental power activation. Additionally, keep a fire extinguisher nearby at all times, as it adds an extra layer of security in case of unforeseen accidents. Remember, a little preparation goes a long way in ensuring smooth and risk-free DIY hardware modifications.
Heading 2: Essential Tools and Equipment: A Comprehensive Checklist for Every DIY Enthusiast
Essential Tools and Equipment: A Comprehensive Checklist for Every DIY Enthusiast
When it comes to tackling DIY projects, having the right tools and equipment is crucial for success. Whether you’re a seasoned DIY enthusiast or just starting out, this comprehensive checklist will ensure you have everything you need to get the job done safely and efficiently. Remember, safety should always be your top priority.
Protective Gear:
- Safety goggles or glasses: Shield your eyes from flying debris and harmful substances.
- Work gloves: Protect your hands from cuts, scrapes, and splinters.
- Dust mask: Filter out dust and hazardous particles, especially when sanding or working with chemicals.
- Ear protection: Guard your ears against loud noises produced by power tools.
Measuring and Leveling Tools:
- Tape measure: Accurately measure lengths, distances, and dimensions.
- Spirit level: Ensure your projects are perfectly straight and level.
- Square ruler: Create precise right angles for flawless cuts and joints.
- Chalk line reel: Mark straight lines quickly and easily.
Power Tools:
- Drill: A versatile tool for creating holes and driving screws.
- Saw: From circular to jigsaw, choose the one that suits your project needs.
- Sander: smooth out rough surfaces for a professional finish.
- Nail gun: a time-saving option for fastening materials securely.
Remember, this checklist only scratches the surface of essential tools and equipment, but it’s a great starting point for any DIY enthusiast. Ensure you have the appropriate tools for each project, and always prioritize safety by using protective gear and following the manufacturer’s instructions. With the right tools and precautions, your DIY adventures are bound to be a success!
Heading 3: Understanding Potential Risks: Identifying and Addressing Safety Concerns in Hardware Modifications
In the world of do-it-yourself (DIY) hardware modifications, it’s essential to prioritize safety above all. Understanding potential risks and diligently addressing safety concerns is paramount to ensuring a successful and incident-free project. In this section, we will explore some key tips and guidelines to help you navigate the safety challenges that may arise during your DIY hardware modification journey.
1. **Research and Plan**: Before diving into any hardware modification project, it is crucial to conduct thorough research and create a solid plan. Take the time to understand the intricacies of your hardware, read user manuals, and familiarize yourself with the potential risks associated with the modifications you intend to make. Create a checklist of safety measures you need to follow and gather the necessary tools and equipment to maintain a safe working environment.
2. **Identify and Assess Risks**: Each hardware modification carries its own set of risks and safety concerns. It is essential to identify and assess these potential hazards before starting your project. From electrical shocks to overheating components, carefully analyze the possible risks and implement appropriate precautions. This may include wearing personal protective equipment (PPE), such as gloves and safety glasses, when handling sensitive components, or ensuring proper grounding to prevent electrostatic discharge.
3. **Addressing Safety Concerns**: Once you have identified potential risks, it’s time to take proactive measures to address them. This may involve insulating exposed wires, securing loose connections, or implementing cooling systems to prevent overheating. Be alert to any warning signs, such as strange noises or unusual smells, during the modification process, and take immediate action to rectify any safety concerns that arise. Regularly test and inspect your modified hardware to ensure continued safety and functionality.
Remember, the key to a successful DIY hardware modification project lies in prioritizing safety at every step. By researching, identifying, and addressing potential risks and safety concerns, you can enjoy the exciting world of hardware modifications while maintaining a secure and incident-free environment. Stay cautious, follow best practices, and always put safety first to maximize the enjoyment and success of your DIY endeavors.
Heading 4: Best Practices and Proven Techniques: Guidelines for a Responsible and Secure DIY Approach
Best Practices and Proven Techniques: Guidelines for a Responsible and Secure DIY Approach
When it comes to DIY hardware modifications, safety should always be your top priority. Whether you’re an experienced enthusiast or just starting out, taking precautionary measures can prevent accidents and ensure a successful project. This comprehensive guide aims to equip you with the knowledge and techniques needed to undertake responsible DIY hardware modifications while keeping safety in mind.
1. Assess the Risks: Before diving into any DIY hardware modification, it is crucial to identify potential risks and hazards associated with the project. Understand the specific modifications you plan to make and assess the impact they may have on the overall functionality and safety of the hardware. Considering factors like electrical wiring, stability, and structural integrity can help you anticipate any potential dangers and plan accordingly.
2. Choose the Right Tools: Using the appropriate tools is vital for executing hardware modifications effectively and safely. Make sure you have a well-stocked toolbox that includes tools specifically designed for the task at hand. Avoid using makeshift tools or improper equipment, as they can compromise your safety and the integrity of the hardware. Investing in quality tools may seem like an additional expense, but it pays off in terms of facilitating a smoother and safer DIY experience.
Heading 5: Expert Recommendations: Trusted Advice to Safely Modify Hardware at Home
When it comes to modifying hardware at home, safety should always be your top priority. Whether you’re a seasoned DIY enthusiast or just starting out, following expert recommendations is crucial to ensure a responsible approach to your projects. To help you on your DIY journey, we’ve gathered some trusted advice from experts in the field.
1. Plan, Plan, Plan: Before picking up that screwdriver, take some time to plan your hardware modification project. Assess the risks involved and make sure you have all the necessary tools and materials at hand. Consult online resources, watch tutorial videos, or seek advice from experienced individuals to understand the process thoroughly. Going into your project well-prepared will not only save you time but also reduce the chances of accidents or mishaps along the way.
2. Safety Gear is a Must: Protecting yourself should always be a priority when working with hardware. Ensure you have all the necessary safety gear on hand, such as safety goggles, gloves, and a dust mask. These simple yet crucial items can prevent injuries and keep you safe from harmful particles or chemicals that may be involved in your modification project.
3. Take It Slow and Test Along the Way: Rushing through a hardware modification is not only risky but may also result in flawed outcomes. Take your time, work methodically, and double-check each step to ensure everything is done correctly. Additionally, testing your modified hardware as you progress can help identify any issues early on. This enables you to address them promptly and avoid potential dangers down the line.
The Way Forward
As we wrap up this guide to responsible DIY hardware modifications, we hope you’ve gained the confidence and knowledge necessary to embark on your own exciting journey of tinkering and customization. The world of DIY modifications offers endless possibilities, allowing you to turn your everyday devices into personalized masterpieces.
Remember, dear readers, that while venturing into the world of hardware modifications can be exhilarating, it’s crucial to prioritize safety above all else. We cannot stress enough the importance of taking precautions and seeking professional guidance whenever necessary.
By equipping yourself with the right tools, understanding the underlying principles, and always keeping safety at the forefront, you can unlock a world of creativity without compromising your well-being or the functionality of your devices.
As you embark on your DIY adventures, take pride in being a responsible modifier, promoting a culture of safety within the DIY community. Share your knowledge and experiences, inspiring others to follow in your footsteps while respecting the importance of caution.
Remember, Rome wasn’t built in a day, and neither should your DIY projects be rushed. Take your time, research thoroughly, and never hesitate to ask for help. With patience, determination, and responsible practices, you’ll discover the endless joys and satisfaction that do-it-yourself hardware modifications bring.
So, fellow tinkerers, go forth and unleash your creativity while keeping safety in mind. Craft your own unique masterpieces, push the boundaries, and explore uncharted territory in the wonderful realm of DIY modifications. With each project you undertake, may it be a testament to your resourcefulness, passion, and commitment to responsible tinkering.
Embrace the adventure, but always remember, “Safety First!